Preparation
Before you start writing programs to control the devices on the robot, you first need to go through the hardware configuration process. On your robot, you will have various different devices connected to different numbered ports on your REV Expansion Hub or REV Control Hub, such as DC motors, servos, and sensors. However, in order to use these devices in our program, we have to create a hardware configuration on our Robot Controller.
To create a hardware configuration, first turn on your robot and Driver Station phone and connect with your robot.
If you are still using a REV Expansion Hub, you will have to also wire your Robot Controller phone to it. Additionally, when first plugging your phone into your robot, this message will popup a few times on your Robot Controller:

Check the “Use by default for this USB device” and choose “OK”. Keep doing this until the boxes go away. This is required in order for your Robot Controller to recognize the devices on your robot.
Hardware Configuration
Once everyone is ready, do the following on your Driver Station phone (you can also do this on your Robot Controller phone if you are using a REV Expansion Hub):
| Picture | Instruction |
|---|---|
 | 1. When you open the Driver Station and connect it to the robot controller, it should look something like this. Click the three dots in the top right to open the menu and click “Configure Robot.” |
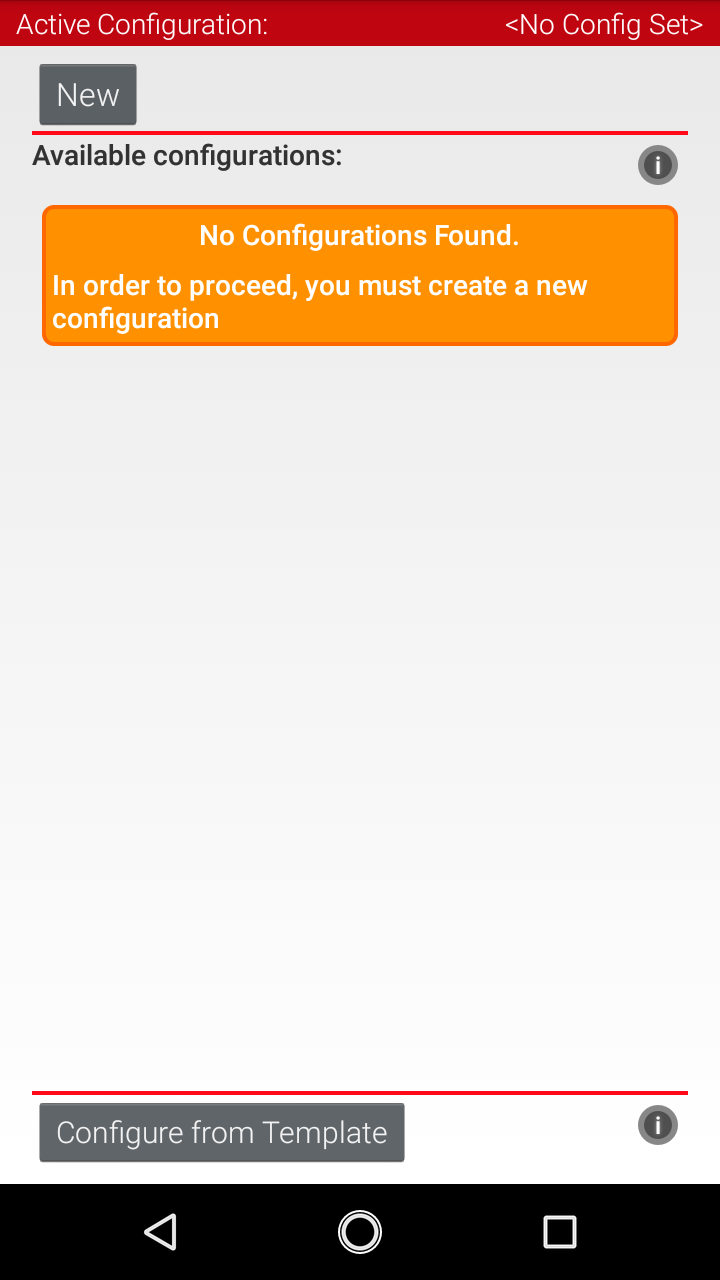 | 2. This will show your list of configurations. Currently, we have no configurations, so let’s click “New” to create one. |
 | 3. If everyone is on and connected, your Expansion Hub Portal (or Control Hub Portal) should show up. |
 | 4. This will show the REV hub(s) on your robot. In our case, we only have one hub (it comes with the Kit of Parts), so we will just choose that one. |
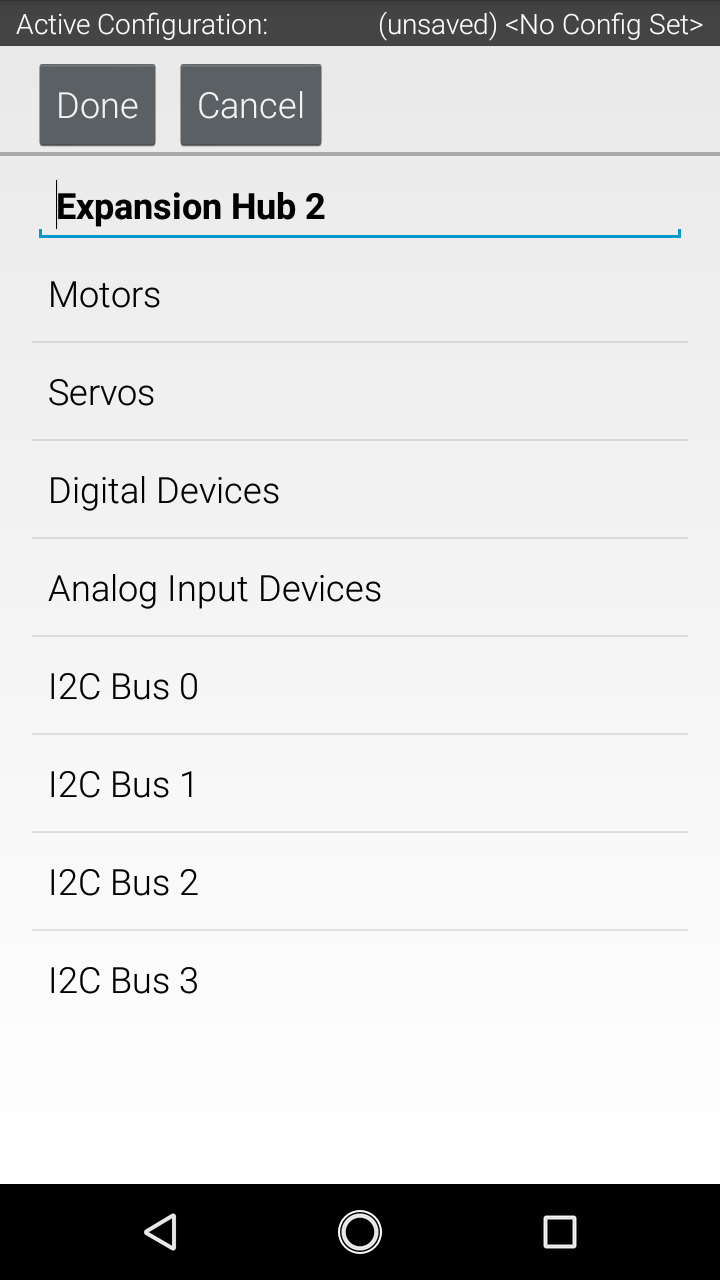 | 5. Now we can see all of the different types of devices that can be connected to our Hub, including motors, servos, and different types of sensors. For this guide, we will configure two drive motors on ports 0 and 1, so click “Motors.” |
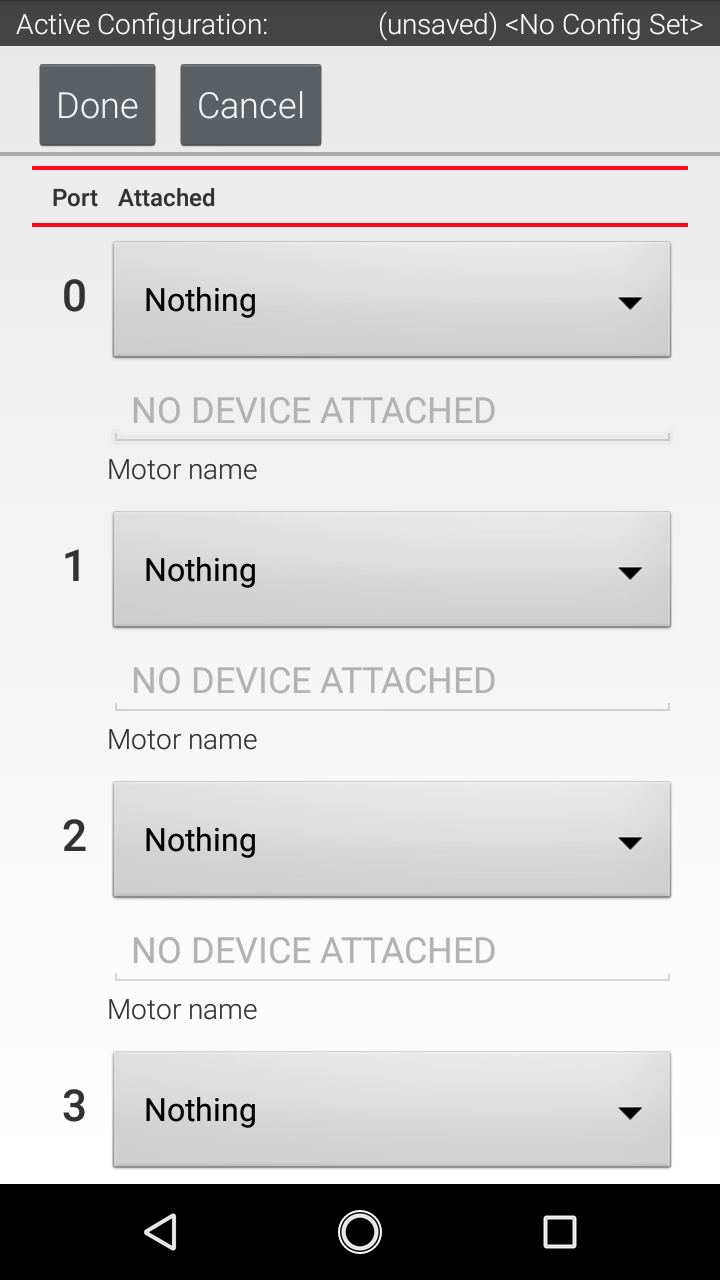 | 6. Here we can see all of the different motor ports on the Hub. On my robot, I have my left drive motor (a REV Core Hex Motor) on port 0, so I am going to select that motor type on port 0 here. |
 | 7. Now that I have selected my motor type on the correct port, I am going to give it a meaningful name: “left.” Also note that when naming devices, it is good practice to use underscores instead of spaces (ex: “left_drive_motor”) |
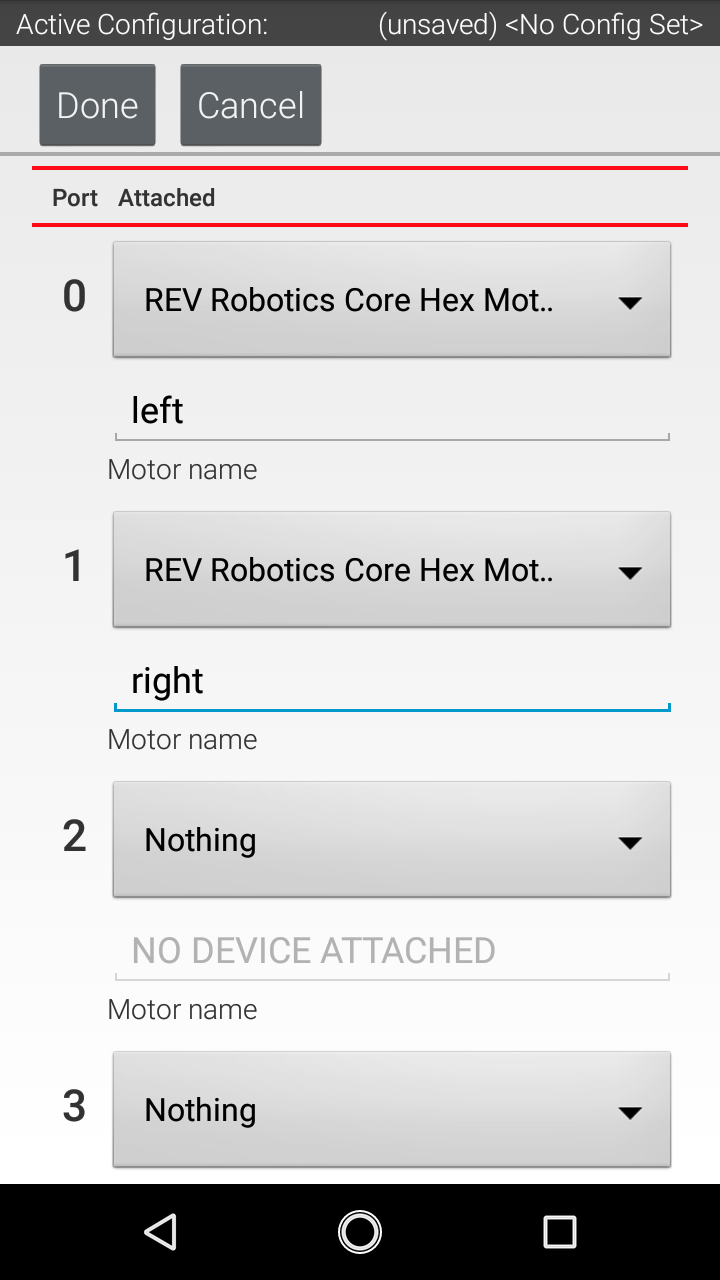 | 8. Here I also configured my right drive motor as “right”, which is plugged into port 1 of my Hub. It is important to remember the names you give your devices, as you will need to use those exact names in your code in order to control those devices. |
 | 9. Once you finish configuring all of your devices, click “Done” in the top left until you are prompted to Save the configuration. Enter a name for your configuration that makes it easy to identity; here, I name mine “2020 Demo Robot.” |
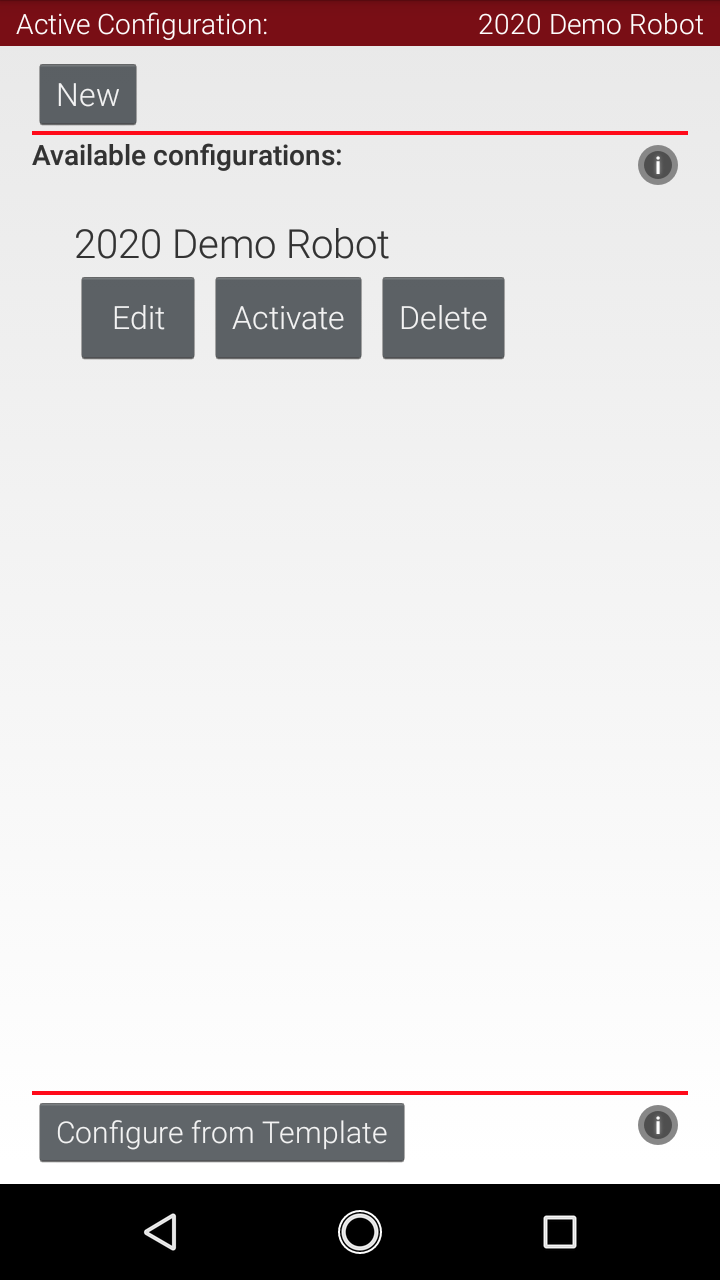 | 10. Now we are back to our list of configurations, and we can see that the configuration that we just created is now there! If you have multiple configurations, you can choose which one to use by clicking the “Activate” button under its name. |
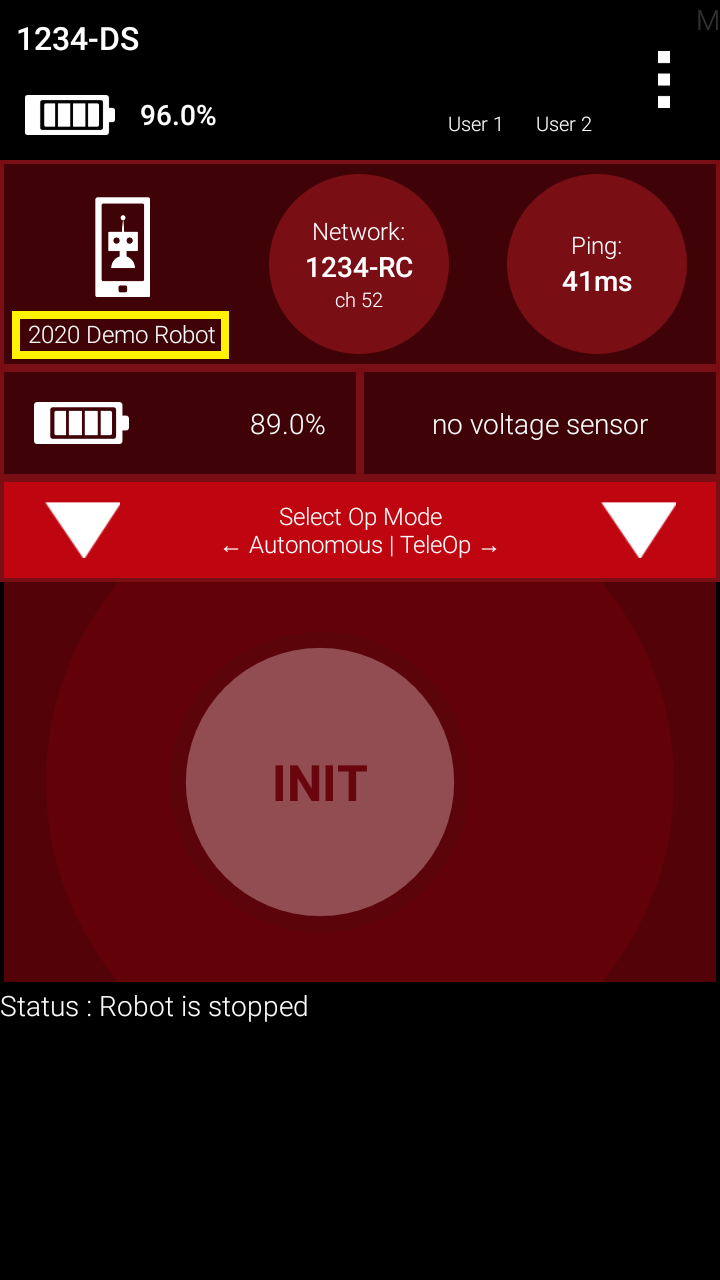 | 11. If we go back to the home page of the Driver Station (click the back arrow button at the bottom of the phone’s screen) we can see on the top left that our configuration “2020 Demo Robot” is now active! This means that we can now reference and control the devices that we named in our code. |