The FIRST Robot Controller Console
Once you access the web tool, you will be greeted with a screen like this:

On the red bar at the top, you can select if you want to program with Blocks or OnBotJava. Since this is a Blocks tutorial, click on “Blocks”. This should take you to this page:

This page will contain any OpModes – programs that control your robot – that you have written. Since we have not wrote any, it is currently empty. There are also some buttons on the top. Let’s click on the “Create a New Op Mode” option to create a new program. This will pop up:

It is asking you to provide a name for your program. In this case, I am calling it “BasicDrive”, but you can call it whatever you want – just make sure that the name makes sense. Also, it is good practice to captilize the first letter of every word in your name (example: “MyNewOpMode”). We can also choose a sample to generate are code from, which is good for if we want to see some code to remind us how to program a certain thing. However, let’s leave the sample blank for now and hit “OK” to create our OpMode!
The Editor
Once you create or open a Blocks OpMode, you will be taken to the Blocks editor. It should look something like this:
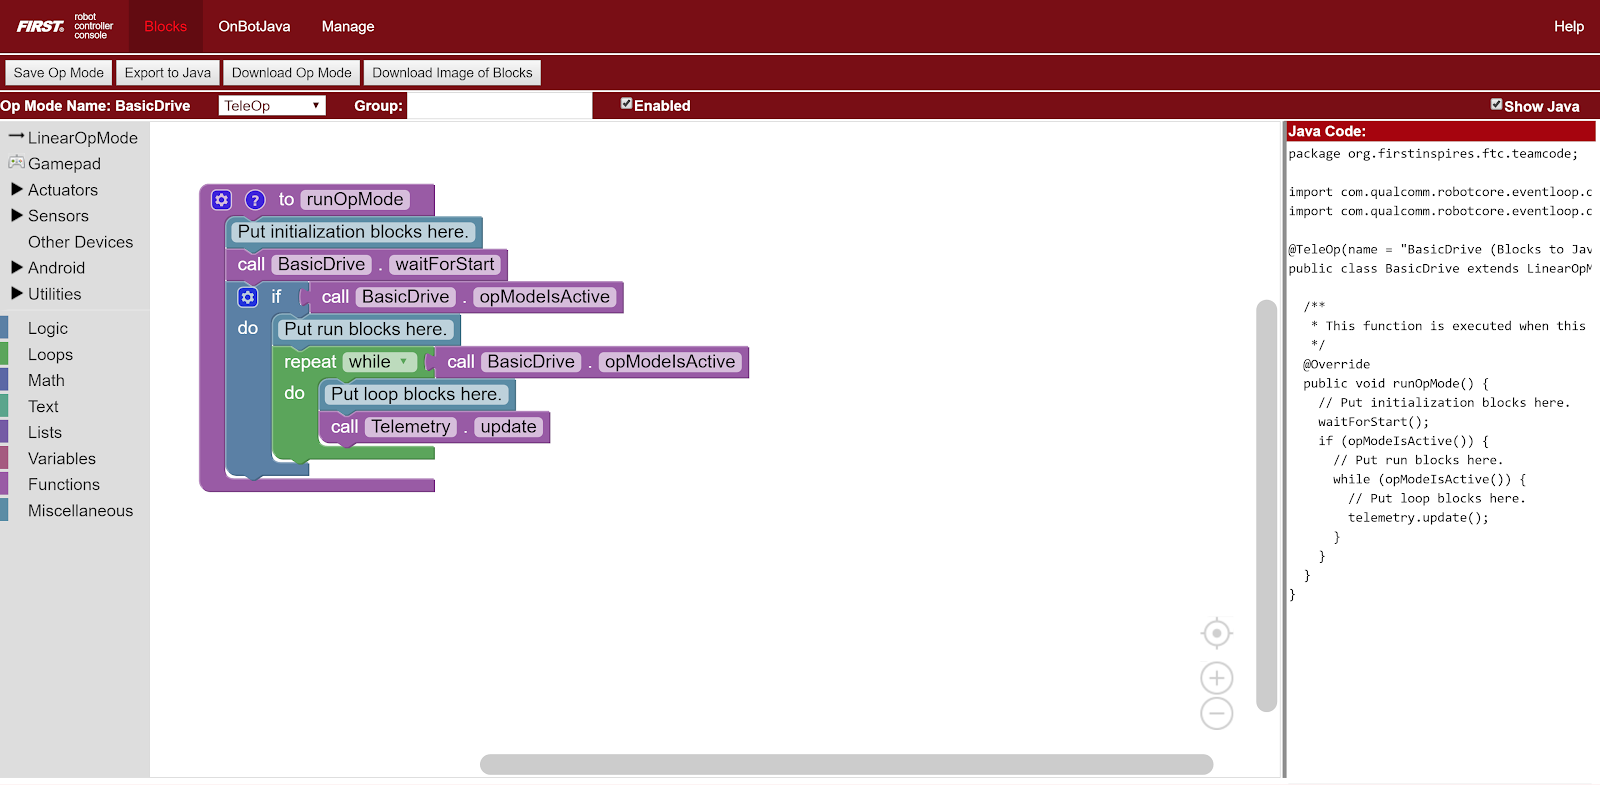
Let’s break down the editor into all of its separate parts:
The Top Bar Options – On the top row of the page, we have four different buttons:
Save Op Mode – This will save all of the code we wrote to the Robot Controller phone so that we can run it. Make sure to do this frequently so that you don’t lose your work!
Export to Java – This will convert all of your code to Java (line-based, more complicated code). You most likely will not have to worry about this option if you are sticking with Blocks.
Download Op Mode – Normally, code is stored on the Robot Controller phone, meaning that if you lose your phone, you will lose all of your code. Hit this button to backup your code on your computer, in case you lose it.
Download Image of Blocks – Downloads a picture of your code.
The Row Below Those Options – This row contains the OpMode (program) named, the type of program (Teleop [driver controller] or Autonomous [automatic]), and whether the program is currently enabled.
The Tool Box – On the left, there is a toolbox containing all of the different blocks that you can use in your code. As you add more hardware devices in your hardware configuration, you will gain more options in the toolbox.
The Code – In the center is the actual program that you are writing. You can drag blocks from the toolbox into the code. You can also click-and-drag blocks that you have already placed to rearrange them.
The Basic Program Flow
Every time you create a new OpMode (robot program) in Blocks, it will generate this basic program template:
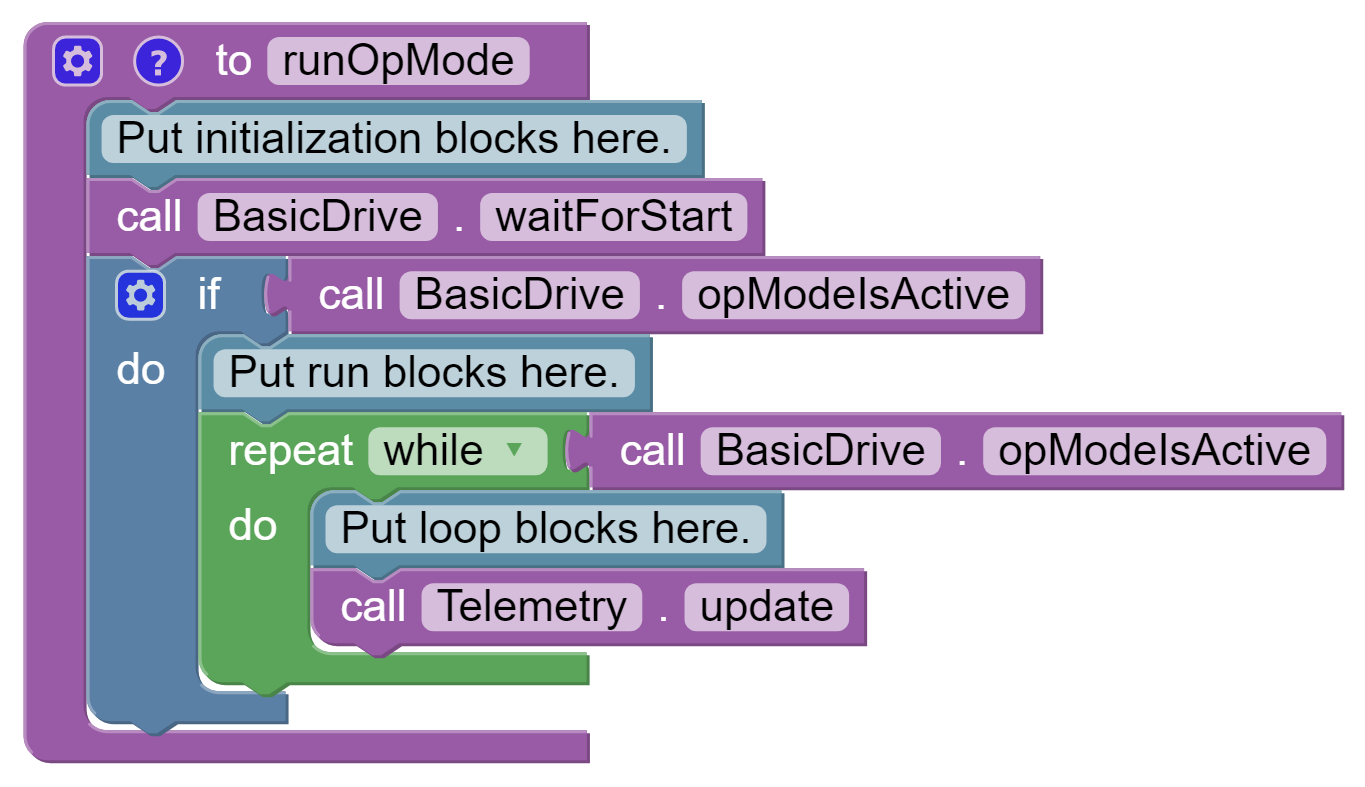
We named this program “BasicDrive” which is why the name appears in the code. Lets break down the main program into its basic parts:
runOpMode – Everything is encased in a “runOpMode” block, meaning that all of the code inside of it is the code that will run. This also means that any code placed outside of the “runOpMode” block will not be ran.
init – There is a comment (a note) in the program that says “Put initialization blocks here.” All blocks put after that comment (but before the “waitForStart”) will be run once when the robot program is initialized. Initialization happens when you press the “Init” button on the Driver Station; in competitions, this is usually pressed before the match starts. This is a good place to put any setup code, like reversing motor directions and configuring motor behaviors.
call BasicDrive.waitForStart – The “waitForStart” block is directly after any init code and before any loop. This block separates the init and loop code. The robot will not run any code after this block until the start button is clicked on the Driver Station.
loop – Once the start button is clicked on the Driver Station, the code will move past the “waitForStart” and reach inside of the green “repeat while opModeIsActive” block. Any code inside of the green block will run continuously (in a loop) until the program is stopped. This is why there is a comment inside of the green block that says “Put loop blocks here”. In the tutorials on this website, if they say to “put this code in the loop”, that means to put it here. This is where all of your main control code will go.